How to Add Chlorine to Hot Tub: A Step-by-Step Guide
Which chlorine for a hot tub should you use?
If you are searching for chlorine for a hot tub, the main choice is usually chlorine granules rather than tablets. Granules are commonly used for spa water because they dissolve quickly and make it easier to adjust sanitizer levels in a smaller body of warm water.
Chlorine tablets are more often associated with swimming pools and can be too slow dissolving or too strong for some spa setups, especially if used without careful control. Always follow the instructions on the product label and your hot tub manufacturer guidance before adding any sanitizer.
- Choose chlorine granules if you want a quick, simple way to raise sanitizer levels in a hot tub.
- Use a clean scoop and add the product in the recommended amount only.
- Run the circulation pumps after dosing so the chlorine disperses through the water.
- Never mix chlorine with other chemicals before adding them to the tub.
- Store chlorine in a cool, dry place with the lid tightly closed.
How to add chlorine to a hot tub and keep levels in range
To use chlorine for a hot tub safely, test the water first, then add a small dose, allow it to circulate and test again. This helps you avoid over-chlorinating and keeps the water comfortable for regular use.
- Test the water before each dose using test strips or a testing kit.
- Check pH first, because chlorine works better when the pH is in the correct range.
- Add chlorine granules to the water in small amounts, following the pack instructions.
- Leave the cover open for a short time after dosing if the product label advises this.
- Run the jets or circulation pump to help the chlorine mix evenly.
- Retest before bathing and wait until the sanitizer reading is at a safe level.
If your chlorine level drops quickly, the water may also need shock treatment or broader water balancing rather than more daily sanitizer alone. If the level stays too high, stop dosing, keep the water circulating and retest until it comes back into range.
Learn how to add chlorine to hot tub safely and effectively with our step-by-step process for sparkling clean water.
Maintaining a spotless hot tub is more than just about crystals and bubbles. Most domestic hot tubs actually hold between 500 to 1500 litres of water, turning chemical balance into a real science project. You might think a quick splash of chlorine does the trick but one wrong calculation and you risk cloudy water or itchy skin for everyone. The real clever bit is not how much chlorine you use but how precisely you measure and mix it. Ready to find the hidden science in your backyard spa?
Table of Contents
- Step 1: Test Your Water Chemistry
- Step 2: Calculate The Required Chlorine Amount
- Step 3: Prepare Chlorine According To Instructions
- Step 4: Add Chlorine To The Hot Tub
- Step 5: Allow The Water To Circulate
- Step 6: Retest Water Chemistry After Treatment
Quick Summary
| Key Point | Explanation |
|---|---|
| 1. Test Your Water Chemistry First | Always check pH, alkalinity, and chlorine levels before adding chlorine. This ensures effective treatment and spa safety. |
| 2. Calculate Chlorine Based on Volume | Determine your hot tub’s water capacity to accurately calculate the necessary chlorine dosage for optimal sanitisation. |
| 3. Prepare Chlorine Carefully | Adhere to manufacturer instructions when dissolving chlorine. Use protective gear and create a proper solution to prevent equipment damage. |
| 4. Distribute Chlorine Evenly | When adding chlorine, ensure the jets are running and distribute it around the perimeter to avoid localised damage. |
| 5. Retest Chemistry Post-Treatment | Wait 15-20 minutes after circulation to retest water chemistry. Adjust as necessary to ensure safe soaking conditions are maintained. |
Step 1: Test Your Water Chemistry
Before adding chlorine to your hot tub, understanding your water’s current chemistry is crucial for effective treatment. Water chemistry testing provides the essential baseline that determines how much chlorine you will need to add and ensures your spa remains safe and comfortable.
To begin, you will need a reliable water testing kit specifically designed for hot tubs. These kits typically include test strips that measure multiple chemical parameters, including pH levels, alkalinity, and sanitiser concentration. When selecting a testing kit, opt for one that provides comprehensive readings and clear instructions.
Carefully remove a test strip and dip it into your hot tub water, ensuring full submersion for the recommended duration specified in the kit’s instructions. Most test strips require a brief three to five second immersion. Once removed, compare the strip’s colour changes against the provided colour chart. This chart will help you interpret the exact chemical levels in your water.
Our comprehensive guide on water testing can provide additional insights into interpreting these results accurately. Pay particular attention to the following key measurements:
- pH Level: Should be between 7.2 and 7.8
- Total Alkalinity: Ideally between 80 and 120 parts per million (ppm)
- Sanitiser/Chlorine Levels: Typically 1 to 3 ppm
If your test results indicate chemical imbalances, you may need to adjust levels before adding chlorine.
Below is a summary table of the main steps involved in adding chlorine to your hot tub, including the purpose of each step and suggested time estimates for completion.
| Step | Purpose | Estimated Time |
|---|---|---|
| Test water chemistry | Establish baseline chemical levels | 5 minutes |
| Calculate chlorine amount | Ensure correct dosage based on tub volume | 5 minutes |
| Prepare chlorine | Safely dissolve or ready chlorine for adding | 5-10 minutes |
| Add chlorine to hot tub | Distribute chlorine effectively | 5 minutes |
| Circulate water | Achieve thorough mixing of chemicals | 15-20 minutes |
| Retest water chemistry | Confirm safe and effective sanitisation | 5 minutes |
The following table provides an overview of the key tools and materials needed for adding chlorine to your hot tub, along with their purposes and relevant notes.
| Tool/Material | Purpose | Notes |
|---|---|---|
| Water testing kit | Measure pH, alkalinity, and chlorine | Choose one designed for hot tubs |
| Chlorine granules or tablets | Sanitises and cleans water | Select form as per hot tub guidelines |
| Digital scale | Precise measurement of chlorine quantity | Essential for accurate dosing |
| Clean bucket | Dissolve chlorine granules | Use separate from any other chemicals |
| Protective gloves | Safety when handling chlorine | Prevents skin irritation |
| Safety glasses | Eye protection during chlorine handling | Especially important with granules |
| Floating dispenser (if using tablets) | Even distribution of chlorine tablets | Prevents surface damage |
Step 2: Calculate the Required Chlorine Amount
Calculating the precise chlorine amount for your hot tub is a critical step that ensures proper water sanitisation and prevents potential health risks. The volume of water in your hot tub directly influences the quantity of chlorine required, making accurate measurement essential.
Begin by determining your hot tub’s total water capacity, which is typically found in the manufacturer’s manual or can be measured by filling the tub and tracking the total litres used. Most domestic hot tubs range between 500 to 1500 litres, so knowing your exact volume is crucial for correct chemical dosing. Learn more about water sanitisers to understand the nuanced requirements of different spa systems.
For standard hot tub maintenance, the general rule is to maintain chlorine levels between 3 to 5 parts per million (ppm). This means you will typically need approximately 10 grams of chlorine granules per 1000 litres of water. However, this can vary slightly depending on usage frequency, bather load, and environmental conditions. A digital scale can help you measure chlorine granules with precision, ensuring you do not under or over-treat your water.
To calculate your specific chlorine requirement, multiply your hot tub’s total water volume by the recommended dosage rate. For instance, a 750-litre hot tub would require approximately 7.5 grams of chlorine granules to reach the optimal sanitisation level. Always round up slightly to ensure comprehensive water treatment, but avoid excessive chlorination which can cause skin irritation and equipment damage.
Always add chlorine gradually and retest your water chemistry after each addition to confirm you have achieved the desired sanitiser concentration.
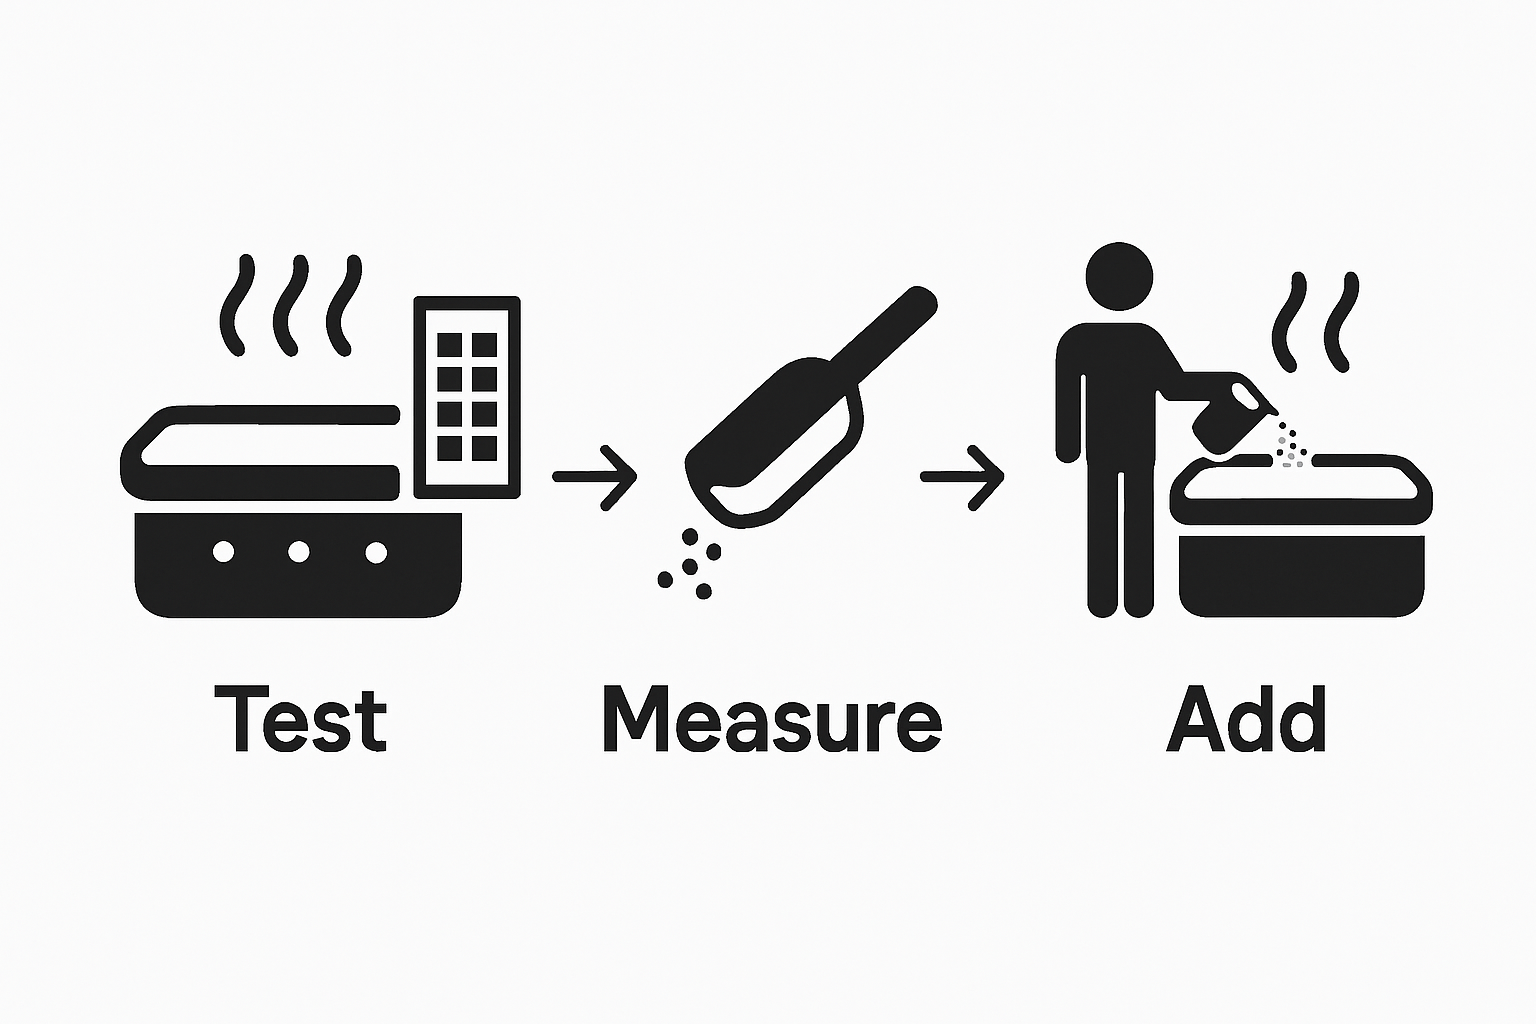 Proper measurement and careful application are key to maintaining a safe and enjoyable hot tub experience.
Step 3: Prepare Chlorine According to Instructions
Preparing chlorine for your hot tub requires meticulous attention to detail and strict adherence to manufacturer guidelines. The goal of this step is to create a precise chlorine solution that will effectively sanitise your hot tub water without causing potential damage to the equipment or risking user safety.
Safety is paramount when handling chlorine products. Before beginning, ensure you are wearing appropriate protective equipment, including rubber gloves and safety glasses. Work in a well-ventilated area away from direct sunlight and always add chlorine to water, never water to chlorine, to prevent potential chemical reactions. Explore our comprehensive guide on water sanitisers for additional safety insights.
Most chlorine products for hot tubs come in granular or tablet form, each requiring slightly different preparation techniques. For granular chlorine, carefully measure the exact quantity calculated in the previous step using a digital scale. Pour the granules into a clean bucket filled with a small amount of warm water, stirring gently until completely dissolved. This creates a concentrated chlorine solution that can be evenly distributed throughout your hot tub.
When using chlorine tablets, select the appropriate number based on your hot tub’s volume and follow the manufacturer’s specific instructions. Some tablets are designed to be placed directly in a floating dispenser, while others require dissolving in a separate container. Avoid throwing tablets directly into the hot tub, as this can cause localised high chlorine concentrations that might damage surfaces or irritate skin.
After preparing the chlorine solution, approach your hot tub with the dissolved mixture. Pour the solution slowly and evenly around the perimeter of the tub while the jets are running. This ensures thorough distribution and helps the chlorine mix completely with the existing water. Wait approximately 15 to 20 minutes with the jets operating to guarantee uniform chemical integration before retesting the water chemistry to confirm proper sanitisation levels.
Step 4: Add Chlorine to the Hot Tub
Adding chlorine to your hot tub is a delicate process that requires precision and care to ensure proper water sanitisation and maintain a safe soaking environment. The goal is to distribute the chlorine evenly while minimising potential damage to your hot tub’s surfaces and equipment.
Timing and technique are crucial when introducing chlorine to your hot tub. Begin by ensuring the hot tub jets are running at medium speed, which helps create water circulation and promotes even chemical distribution. This movement prevents chlorine from settling in one area and potentially causing localised damage. Check out our top tips for balancing chemical levels to understand the nuanced approach to hot tub maintenance.
Pour the prepared chlorine solution slowly around the perimeter of the hot tub, moving in a consistent circular motion. This technique ensures the chlorine mixes thoroughly with the existing water. Avoid pouring the solution directly into the skimmer or filter area, as this can concentrate chemicals in one location and potentially damage these critical components. If using chlorine tablets, place them in a floating dispenser that allows controlled, gradual release.
After adding the chlorine, allow the hot tub to run for approximately 15 to 20 minutes with the jets operating. This continuous circulation helps the chlorine integrate completely and reach all areas of the water.
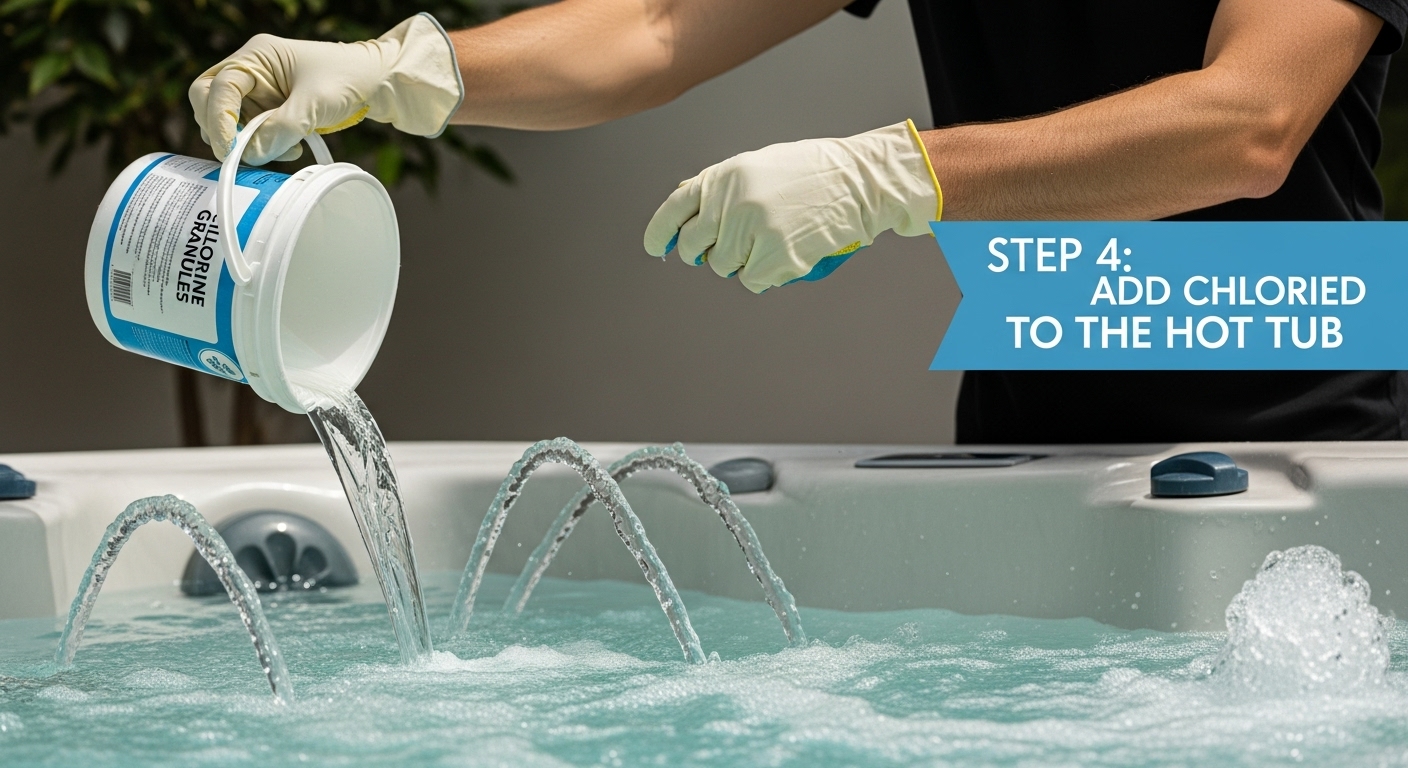 During this time, keep the hot tub cover off to allow any excess gases to dissipate and prevent potential pressure buildup.
Once the circulation period is complete, retest the water chemistry using your test strips to confirm the chlorine levels have reached the desired 3 to 5 parts per million range. If the levels are not yet optimal, you may need to make slight adjustments. Remember that environmental factors like temperature, sunlight, and bather load can influence chlorine effectiveness, so regular monitoring is essential for maintaining a safe and enjoyable hot tub experience.
Step 5: Allow the Water to Circulate
Circulation is the critical process that ensures your newly added chlorine distributes evenly throughout the hot tub, effectively sanitising every drop of water. This step transforms the localised chlorine treatment into a comprehensive water purification process that protects against harmful bacteria and maintains optimal water quality.
Activate your hot tub jets at medium to high intensity to create robust water movement. The circulation process helps dissolve chlorine granules completely and prevents chemical stratification, where sanitising agents might concentrate in specific areas. Explore our essential hot tub maintenance checklist to understand the broader context of water treatment and circulation.
Leave the jets running for approximately 15 to 20 minutes, which provides sufficient time for thorough chemical distribution. During this period, observe the water’s movement and ensure all areas of the hot tub receive equal circulation. Pay attention to any potential dead spots where water might not flow consistently, such as corners or areas near the steps. If you notice minimal movement in certain regions, manually adjust the jet angles to improve overall water circulation.
Keep the hot tub cover open during this circulation period to allow gases to dissipate and prevent potential pressure buildup. The open cover also helps you monitor the water’s appearance and ensures no unusual foaming or discolouration occurs. After the circulation period, conduct another quick water chemistry test to confirm the chlorine levels remain consistent and within the recommended 3 to 5 parts per million range.
Remember that proper circulation is not just about adding chemicals but creating a dynamic environment where sanitising agents can work effectively. The goal is to create a uniform, well-mixed water environment that provides comprehensive protection against potential contaminants and ensures a safe, enjoyable hot tub experience.
Step 6: Retest Water Chemistry After Treatment
Retesting your hot tub water chemistry after chlorine treatment is a critical final step that confirms the effectiveness of your sanitisation process and ensures the water remains safe for soaking. This verification process helps prevent potential health risks and protects your hot tub equipment from chemical imbalances.
Timing is essential when retesting water chemistry. Wait approximately 15 to 20 minutes after circulating the chlorine to allow complete chemical integration and stabilisation. Explore our comprehensive spa water care guide to understand the nuanced approach to water maintenance. Use a fresh test strip from your water testing kit, ensuring it has not expired and has been stored in a cool, dry location to maintain accuracy.
Carefully remove a new test strip and submerge it into the hot tub water, following the manufacturer’s specific instructions for immersion time. Most test strips require a three to five second submersion to provide accurate readings. Remove the strip and immediately compare the colour changes against the provided colour chart, paying close attention to key parameters such as free chlorine levels, pH, and total alkalinity.
The ideal readings you should aim to achieve include a chlorine concentration between 3 to 5 parts per million, a pH level between 7.2 and 7.8, and total alkalinity ranging from 80 to 120 parts per million. If your test results deviate significantly from these recommended ranges, you may need to make additional chemical adjustments. Small variations can typically be corrected by adding minute quantities of chlorine or pH balancing chemicals.
Should your test results indicate substantial chemical imbalances, do not use the hot tub until you have restored proper water chemistry. Repeated testing and careful adjustment are key to maintaining a safe, hygienic, and enjoyable hot tub environment. Remember that consistent monitoring and proactive maintenance prevent more complex water treatment challenges in the future.
Take the Uncertainty Out of Hot Tub Water Care with ClearSpa
Adding chlorine to your hot tub can seem overwhelming, especially when balancing precise measurements and keeping your water safe and inviting. Many spa owners worry about chemical imbalances, unclear instructions, or risking damage to their hot tub equipment. This guide has shown just how important it is to test water chemistry, measure chlorine accurately, and ensure even distribution - every step matters for hygiene and peace of mind.
Why struggle with second-guessing water treatment? Bring confidence to your hot tub routine using expertly formulated products trusted across the UK. Shop our meticulously tested water treatment essentials and rely on our expert advice on water sanitisers to make every soak worry-free.
Ready for crystal-clear results? Visit ClearSpa today and discover spa chemicals designed to give you spotless, safe water - so you can unwind without hesitation. Begin your water care upgrade now and experience the ClearSpa difference with your very next dip.
Frequently Asked Questions
What are the ideal chlorine levels for a hot tub?
The ideal chlorine levels for a hot tub should be maintained between 3 to 5 parts per million (ppm). This range ensures effective sanitisation and helps prevent health risks associated with poorly maintained water.
How do I test my hot tub water chemistry before adding chlorine?
To test your hot tub water chemistry, use a reliable water testing kit specifically designed for hot tubs. This typically includes test strips that measure pH levels, total alkalinity, and sanitiser concentration. Dip a test strip into the hot tub water for three to five seconds, remove it, and compare the colour changes against the provided colour chart.
How should I prepare chlorine granules for my hot tub?
To prepare chlorine granules, measure the exact quantity needed for your hot tub using a digital scale. Dissolve the granules in a clean bucket filled with a small amount of warm water, stirring until completely dissolved to create a concentrated chlorine solution that can be evenly distributed throughout the hot tub.
How long should I circulate the water after adding chlorine?
After adding chlorine to your hot tub, you should circulate the water with the jets running for approximately 15 to 20 minutes. This ensures thorough mixing of the chlorine with the water, promoting effective sanitisation throughout the entire hot tub.