Mastering the Spa Filter Cleaning Process for Optimal Performance
Follow our step-by-step guide to effectively clean your spa filter, ensuring long-lasting performance and a pristine spa experience.
Cleaning a spa filter might sound simple and many people assume a quick rinse will do the job. Yet studies show that systematic rinsing removes up to 70 percent of surface contaminants before deeper cleaning even starts. The real surprise is that using the wrong cleaner or too much pressure can actually shorten your filter’s lifespan and make your water quality worse, not better.
Table of Contents
- Prepare Your Workspace And Gather Supplies
- Remove The Spa Filter From Its Housing
- Rinse The Filter Using A Hose
- Soak The Filter In Cleaning Solution
- Rinse The Filter Again For Optimal Cleanliness
- Reinstall The Filter And Test The Spa
Quick Summary
| Key Point | Explanation |
|---|---|
| 1. Set up a suitable workspace | Choose a well-ventilated area with access to water, drainage, and good lighting for effective cleaning. |
| 2. Use recommended cleaning solutions | Opt for manufacturer-recommended cleaning products to protect your filter and maintain its performance. |
| 3. Rinse the filter correctly | Use a garden hose on medium pressure, rinsing from top to bottom while rotating the filter for thorough cleaning. |
| 4. Soak filter in cleaning solution | Submerge the filter in a suitable cleaning solution for 12-15 hours to remove stubborn contaminants effectively. |
| 5. Inspect and test after reinstallation | Check for proper fit and system operation after reinstalling the filter to ensure optimal performance and prevent issues. |
Prepare Your Workspace and Gather Supplies
Preparing your workspace for a thorough spa filter cleaning process requires strategic organisation and careful planning. Proper preparation will streamline your maintenance routine and ensure you can complete the task efficiently and effectively.
Setting Up Your Workspace
Select a well-ventilated area outdoors or in a utility space where you can comfortably work without creating mess or disruption. Ideally, choose a location with access to water, drainage, and sufficient lighting.
Below is a summary of essential tools and materials needed for effective spa filter cleaning, including their key purposes and any special recommendations.
| Tool/Material | Purpose | Special Notes |
|---|---|---|
| Protective rubber gloves | Shield hands from chemicals and debris | Essential for safety |
| Bucket or large container | Soaking filter in cleaning solution | Must be large enough for full submersion |
| Garden hose with spray nozzle | Rinsing off loose dirt and cleaning solution | Adjustable nozzle recommended for moderate pressure |
| Specialised spa filter cleaner | Dissolving ingrained oils and contaminants | Use only manufacturer-approved solutions |
| Soft bristle brush | Removing stubborn debris from pleats | Use gently to avoid damaging filter material |
| Clean towels or drying rack | Drying filter after cleaning | Ensure towels are lint-free or use rack for air drying |
| Replacement filter (optional) | Replacing if original filter is damaged | Have on hand in case of extensive wear or damage |
The essential tools and materials for your spa filter cleaning process include:
- Protective rubber gloves
- Bucket or large cleaning container
- Garden hose with adjustable spray nozzle
- Specialised spa filter cleaning solution
- Soft bristle brush
- Clean towels or drying rack
- Replacement filter (optional but recommended)
Gathering Specialised Cleaning Supplies
Your cleaning solution is crucial for achieving optimal results. While generic household cleaners might seem tempting, they can damage your spa filter’s delicate materials. According to Water Treatment and Purification Magazine, using manufacturer-recommended cleaning solutions helps maintain filter integrity and extends its operational lifespan.
Before beginning, inspect your current filter for visible damage or excessive wear. If the filter appears significantly degraded, consider having a replacement ready. This proactive approach prevents unexpected interruptions during your cleaning process and ensures your spa remains in top condition.
The following table provides an at-a-glance step-by-step overview of the spa filter cleaning process, including estimated timeframes and key actions for each stage.
| Step | Key Action | Estimated Time |
|---|---|---|
| Prepare workspace and gather supplies | Set up area, collect all tools and materials | 10-15 minutes |
| Remove spa filter from housing | Power off, carefully extract filter | 5-10 minutes |
| Rinse filter using a hose | Gently hose off surface debris | 5-10 minutes |
| Soak filter in cleaning solution | Submerge and leave to soak | 12-15 hours |
| Rinse filter again after soaking | Remove remaining solution and contaminants | 5-10 minutes |
| Inspect and reinstall filter | Check filter quality, securely reinstall | 5-10 minutes |
| Test spa system | Restore power, check performance | 10 minutes |
Take a moment to read your spa manufacturer’s specific maintenance guidelines, as different models might have unique requirements. Some filters require specific cleaning techniques or solutions that vary from standard procedures. By understanding these nuanced instructions, you will protect your equipment and maintain its performance more effectively.
Remove the Spa Filter from its Housing
Removing your spa filter requires precision and careful technique to prevent damage to both the filter and the spa’s internal components. This critical step sets the foundation for a thorough cleaning process and ensures you can effectively access and restore your filter’s performance.
Understanding Filter Removal Technique
Before attempting removal, turn off the spa’s power completely at the circuit breaker. This safety measure prevents potential electrical hazards and ensures the pump cannot activate unexpectedly during your maintenance work. When approaching filter removal, observe the specific configuration of your spa model. Most spa filters are located in a designated compartment with a twist or pull-out mechanism.
Approach the removal process methodically. Locate the filter housing, which is typically positioned near the spa’s pump area. Some models feature a clear lid allowing visual confirmation of the filter’s position. Gently rotate the filter housing cover counterclockwise to unlock it. If resistance occurs, avoid using excessive force that might crack the housing or damage the seal.
As you remove the filter, pay attention to its orientation and position. Each filter is designed to fit precisely, and noting its original placement will simplify reinstallation. Some filter cartridge cleaning solutions recommend photographing the filter’s original position as a helpful reference point.
Carefully lift the filter straight upwards, avoiding sideways wiggling that could damage the housing or filter pleats. Inspect the housing interior for any visible debris, mineral buildup, or signs of wear while the filter is removed. This quick visual check can provide insights into your spa’s overall maintenance needs.
Verification is crucial after removal. A properly removed filter should come out smoothly without forcing or twisting. Check the filter for obvious signs of damage such as tears, extreme discolouration, or collapsed pleats. If significant wear is evident, consider preparing a replacement filter before proceeding with the cleaning process. By following these careful steps, you will successfully remove your spa filter, setting the stage for thorough and effective maintenance.
Rinse the Filter Using a Hose
Rinsing your spa filter with a garden hose represents a crucial cleaning stage that removes loose debris, trapped particles, and preliminary contaminants. This initial rinse prepares the filter for more intensive cleaning and helps restore its filtration efficiency.
Selecting the Correct Water Pressure
Choose a garden hose with an adjustable spray nozzle to control water pressure carefully. High-pressure streams can damage delicate filter pleats, so opt for a gentle, medium-pressure spray pattern. Position the hose nozzle at a 45-degree angle, maintaining a consistent distance of approximately 15-20 centimetres from the filter surface.
Begin rinsing from the top of the filter, working methodically downward to ensure comprehensive cleaning. Direct the water stream between the filter pleats, allowing it to flush out accumulated debris. According to Water Treatment Research Journal, systematic rinsing can remove up to 70% of surface contaminants before more intensive cleaning methods.
Comprehensive Debris Removal
Rotate the filter periodically during rinsing to access all surfaces evenly. Pay special attention to areas where minerals, oils, and organic matter tend to accumulate. Look for visible discolouration or stubborn particles that might require additional attention. Some spa owners find that gently rotating the filter while spraying helps dislodge trapped particles more effectively.
Verify the effectiveness of your rinse by observing the water running off the filter. Clean water indicates successful initial debris removal, while murky or dirty runoff suggests more thorough cleaning is necessary. Take your time during this process, ensuring each section of the filter receives adequate attention.
After completing the initial rinse, gently shake the filter to remove excess water, being careful not to damage the delicate pleated structure. A successful rinse prepares your filter for the next stages of the cleaning process, setting the foundation for optimal spa maintenance and water quality.
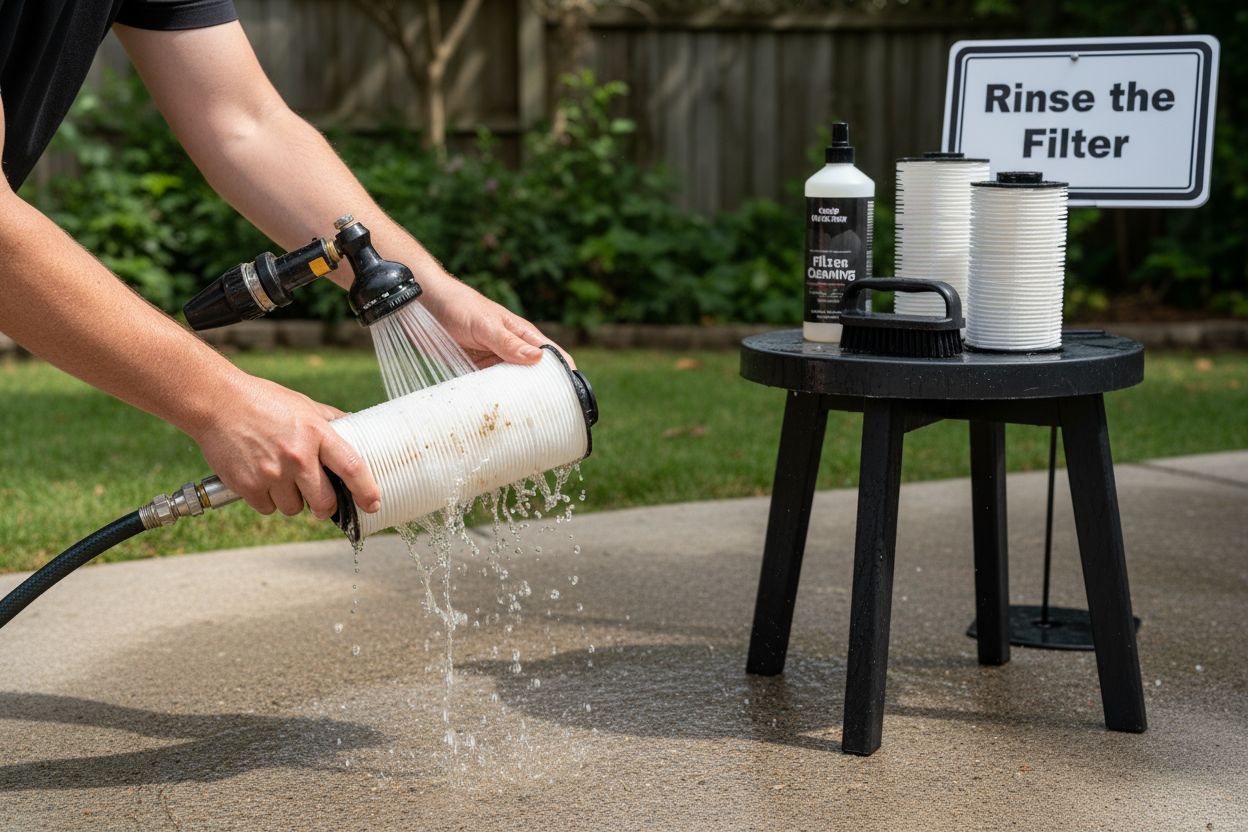 By following these precise techniques, you will effectively remove preliminary contaminants and prepare your filter for more intensive treatment.
Soak the Filter in Cleaning Solution
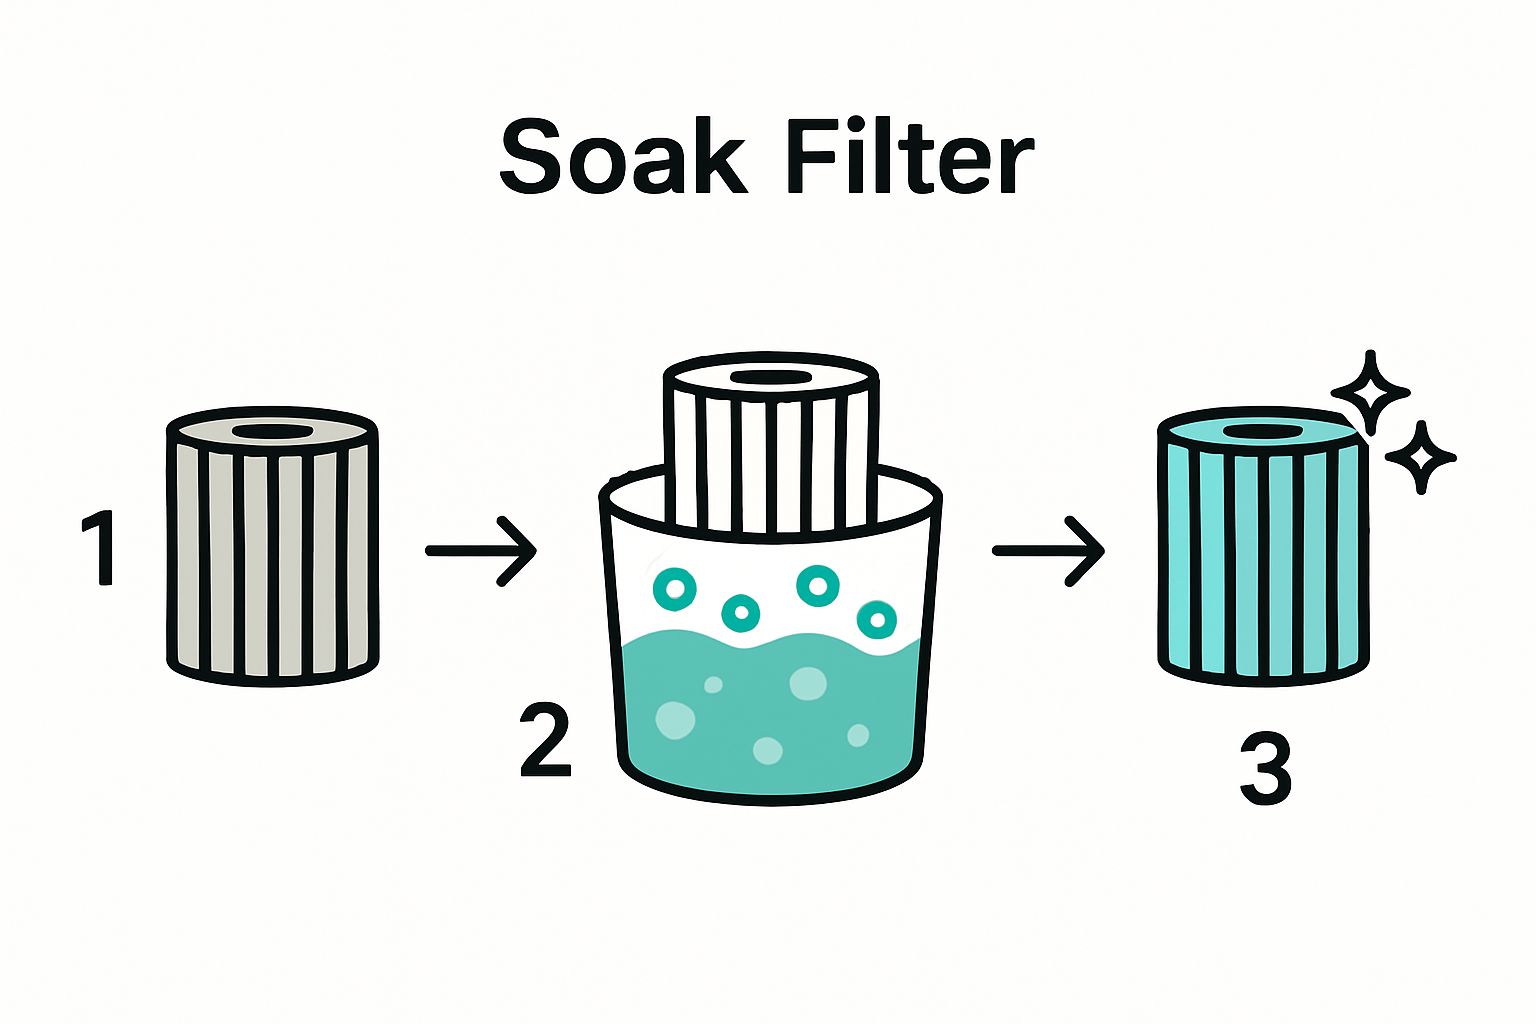
Soaking your spa filter in a specialised cleaning solution represents a transformative stage in the maintenance process, effectively dissolving stubborn contaminants and restoring the filter’s filtration capabilities. This critical step goes beyond surface cleaning, penetrating deep into the filter’s intricate pleated structure.
Preparing the Cleaning Solution
Select a high-quality filter cleaning solution specifically designed for spa filters. Our instant filter cleaner provides optimal results, ensuring thorough decontamination without damaging delicate filter materials. Choose a clean, large container that allows complete filter submersion, maintaining a ratio of approximately one part cleaning solution to three parts water.
Mix the cleaning solution precisely according to manufacturer instructions. Water temperature plays a crucial role in this process, with lukewarm water typically providing the most effective cleaning environment. According to Water Treatment and Maintenance Research, temperatures between 35-40 degrees Celsius create an ideal chemical reaction for breaking down organic and mineral deposits.
Soaking and Contamination Removal
Submerge the filter completely, ensuring all pleats are covered by the cleaning solution. Allow the filter to soak for 12-15 hours, which provides sufficient time for the chemical solution to penetrate and dissolve accumulated contaminants. Avoid excessive soaking beyond 24 hours, as prolonged exposure might potentially degrade filter materials.
While soaking, gently agitate the filter periodically to encourage thorough cleaning. This gentle movement helps dislodge trapped particles and ensures comprehensive solution distribution across the filter’s surface. Observe the water colour during soaking, which will gradually change as oils, minerals, and debris are released from the filter material.
After the recommended soaking duration, remove the filter and rinse thoroughly with clean water. The successful completion of this stage is evident through significantly clearer water runoff and a noticeably improved filter appearance. By meticulously following these steps, you will restore your spa filter’s optimal performance and extend its functional lifespan.
Rinse the Filter Again for Optimal Cleanliness
The final rinsing stage is crucial for removing residual cleaning solution and ensuring your spa filter is completely free from chemical traces and loosened contaminants. This meticulous process guarantees that your filter is ready for reinstallation and optimal spa performance.
Thorough Rinsing Technique
Begin by selecting a garden hose with an adjustable spray nozzle, preferably one that allows precise pressure control. Avoid high-pressure settings that might damage the delicate filter pleats. Instead, choose a gentle, consistent spray pattern that can effectively flush out remaining cleaning solution and dislodged particles. Filter cleaner granules recommend a systematic approach to ensure comprehensive cleaning.
Position the filter vertically and start rinsing from the top, allowing water to flow downward through the pleats. Rotate the filter periodically to ensure complete coverage, paying special attention to areas between the pleats where cleaning solution and debris might accumulate. According to Water Treatment and Filtration Research, a thorough rinse should continue until the water running off the filter appears completely clear and free from any visible residue.
Final Inspection and Preparation
As you rinse, conduct a visual inspection of the filter. Look for any remaining discolouration, mineral deposits, or trapped particles. Gently manipulate the filter to ensure water penetrates all areas, but be cautious not to bend or damage the pleated structure. The goal is to create a pristine filter surface that is completely free from chemical treatments and contaminants.
Once rinsing is complete, gently shake the filter to remove excess water. Hold the filter up to natural light to verify its cleanliness, checking for any remaining debris or unusual discolouration. A properly rinsed filter should appear uniform in colour and texture, with no visible residue or cleaning solution remnants.
The successful completion of this stage is evident through crystal-clear water runoff, a clean filter appearance, and the absence of any chemical odours. By following these precise rinsing techniques, you will ensure your spa filter is thoroughly cleaned and prepared for optimal performance in your spa system.
Reinstall the Filter and Test the Spa
Returning your freshly cleaned spa filter to its housing represents the final stage of your maintenance process, requiring precision and careful attention to ensure optimal spa system performance. This crucial step transforms your meticulous cleaning efforts into tangible spa functionality.
Precise Filter Reinstallation
Carefully align the filter with its original housing, remembering the orientation observed during initial removal. Most spa filters feature specific alignment markers or grooves that ensure correct positioning. Gently lower the filter straight down, avoiding any sideways twisting that might damage the delicate pleated structure. Apply gentle, consistent pressure to seat the filter completely, ensuring a tight and secure fit.
Before fully closing the filter housing, perform a quick visual inspection. Confirm the filter sits evenly and there are no visible gaps or misalignments. According to Spa Maintenance Technical Journal, improper filter installation can lead to reduced water circulation efficiency and potential system strain.
System Activation and Performance Verification
Once the filter is securely reinstalled, restore power to the spa at the circuit breaker. Allow the system to initialise, monitoring the startup process for any unusual sounds or operational irregularities. Some spa owners find it helpful to review our instant filter cleaner guidelines to ensure optimal post-maintenance performance.
Initiate a complete spa system cycle, observing water flow and checking for consistent water pressure. Listen carefully for any unusual pump noises that might indicate improper filter installation. The water should circulate smoothly, with clear, consistent movement across the spa surface.
Verify the system’s performance by checking water clarity and monitoring the pressure gauge. A successful reinstallation will be evident through stable water pressure, clear water appearance, and smooth operational sounds. By following these precise steps, you will complete your spa filter maintenance process, ensuring optimal spa performance and extending the longevity of your filtration system.
Transform Your Spa Filter Care with ClearSpa Expertise
Are you tired of stubborn contaminants and inconsistent water quality despite your best spa filter cleaning efforts? The article highlighted common frustrations such as ineffective cleaning with generic products, risk of damaging filter pleats and the worry of unexpected spa downtime due to worn-out filters. These pain points can undermine your peace of mind and the enjoyment of your hot tub.
Choose only the best for your maintenance routine. ClearSpa’s range of instant filter cleaner and filter cleaner granules are crafted for sophisticated yet gentle cleaning, extending your filtration system’s lifespan and safeguarding your investment. Every product is rigorously tested, aligning perfectly with professional cleaning recommendations so you can trust that each soak will be as relaxing and refreshing as possible.
Experience the ultimate upgrade in spa filter care today. Visit ClearSpa now to explore our curated collection and restore your spa to perfect clarity. Don’t wait for poor water quality to ruin your relaxation - act now and master your maintenance with confidence.
Frequently Asked Questions
How often should I clean my spa filter for optimal performance?
Cleaning your spa filter every 4-6 weeks will maintain its effectiveness and prolong its lifespan. Set a reminder to clean the filter on a consistent schedule, aligning the task with your spa maintenance routine.
What is the best method to rinse my spa filter before soaking?
Use a garden hose with an adjustable spray nozzle on a gentle setting to rinse your spa filter. Start at the top and work your way down, ensuring water flows through all pleats. Aim to remove as much loose debris as possible before soaking, which should greatly enhance the cleaning process.
How long should I soak my filter in the cleaning solution?
Soak your spa filter for 12-15 hours in a specialised cleaning solution for optimal results. Prepare the solution according to the manufacturer’s instructions, ensuring the filter is completely submerged during the soaking period to effectively remove contaminants.
What should I do if my filter shows signs of damage after removal?
Inspect the filter closely for tears or significant wear; if any damage is evident, replace the filter immediately. Taking this precaution will help prevent further degradation of your spa’s filtration system and maintain water quality.
How can I ensure my filter is installed correctly after cleaning?
Align the filter with its original housing and gently lower it into place, avoiding any twisting that could damage it. Conduct a visual inspection before closing the housing to ensure a secure fit, which is crucial for maintaining proper water circulation.
What signs indicate that my spa filter needs cleaning or replacement?
If you notice cloudy water or reduced water flow, it may be time to clean or replace your spa filter. Monitor the pressure gauge; if the pressure is significantly higher than usual, this indicates the filter is likely clogged and needs attention.